Chapter 2
Traffic Signs: Categories & How to Read Them
Belgium has hundreds of traffic signs, but only seven families of shape and colour. Once you know the families, you can make a good guess at any sign's meaning — even one you've never seen before.
A — Warning signs
Triangular, with a red border and a black symbol on a white or yellow background. They warn you about a hazard ahead — they don't command anything themselves, but you must adapt your driving to the danger they describe.
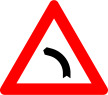
A1a — bend to the left
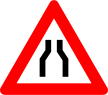
A7a — road narrows on both sides
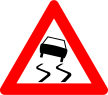
A15 — slippery road
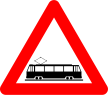
A49 — tram crossing ahead
B — Priority signs
These two signs are so important they get their own unique shapes, recognisable even upside down or covered in snow: the downward triangle means 'give way', the octagon means 'stop' — a full stop is compulsory, even if the road looks clear.
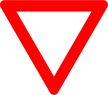
B1 — give way

B5 — stop
Advance warning of a give-way or stop sign
B3 and B7 are advance-warning versions of B1 and B5: B3 tells you a give-way junction is coming up, B7 tells you a stop sign is coming up, each at the distance shown on the sign itself.
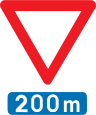
B3 — advance warning: give-way junction ahead
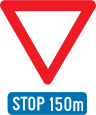
B7 — advance warning: stop sign ahead
A third priority sign works differently: the yellow diamond means you are on a priority road and keep priority over side roads at every junction until a sign cancels it — unlike B1 and B5, which apply only to the one junction where they stand.

B9 — priority road
C — Prohibitory signs
Circular, with a red border on a white background. They forbid something — usually a movement or a type of road user. If the sign shows only a plain red circle with no symbol inside, it means no vehicles are allowed at all, in either direction.

C1 — no entry, one-way restriction (oncoming traffic still allowed)

C3 — no entry for any vehicle, in both directions

C43 — maximum speed (here 50 km/h)
D — Mandatory signs
Circular, with a blue background and a white symbol — the mirror image of a prohibition sign. Instead of forbidding something, they command a specific direction or action that you must follow.

D1a — mandatory direction: straight ahead only

D1b — mandatory direction: left only (rotated 90° for the mirror-image right-only version)

D7 — mandatory cycle track
D7 makes the cycle track compulsory: cyclists and moped class A riders must use it instead of the carriageway.

D1d — obstacle ahead: pass it on the side shown by the arrow
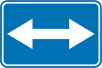
F21 — you may pass this obstacle or traffic island on either the left or the right
E — Parking and stopping signs
Rectangular signs that regulate parking and stopping. A blue panel with a white 'P' means parking is allowed, sometimes with conditions; a red diagonal bar through it means parking is forbidden there.

E1 — no parking

E9a — parking permitted

E3 — no stopping or parking
E1 and E3 look similar but mean different things: E1 forbids parking, but you may still stop briefly, for example to drop someone off. E3 forbids stopping altogether — you may not even wait there for a moment.
F — Indication (information) signs
Usually rectangular and blue. They neither warn nor forbid — they give you practical information: where a built-up area starts, that a road is a dead end, which lane leads where, or where a motorway begins.

F45 — dead end (no through road)

F19 — one-way traffic
F19 tells you a street carries one-way traffic, so oncoming vehicles won't appear there — though a small panel can still let specific road users, cyclists included, travel the other way. Otherwise, keep right as usual, and parking is fine on whichever side of the street has room. It's easy to mix this sign up with D1a, but they're not the same kind of sign at all: F19 is purely descriptive, whereas D1a is an actual instruction tied to one specific junction.
M — Additional panels
Small rectangular panels placed underneath a main sign. They never appear alone — they narrow, extend, or add an exception to the meaning of the sign above them, such as a distance, a time restriction, or an exempted group of road users.
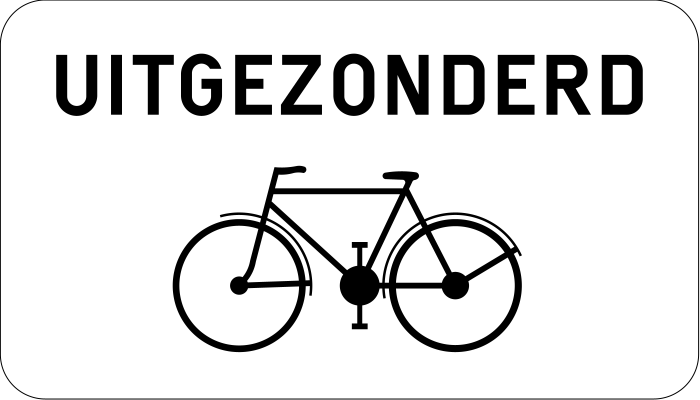
M2 — 'except cyclists' (used under a prohibition sign)
More warning signs to recognise
You already know the pattern: a red-bordered triangle warns of a hazard, and its pictogram shows what that hazard is. Here are common ones the exam expects you to recognise on sight.
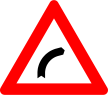
A1b — bend to the right
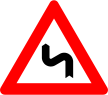
A1c — two or more bends, the first to the left
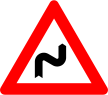
A1d — two or more bends, the first to the right
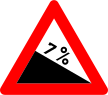
A3 — steep descent
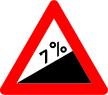
A5 — steep climb
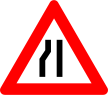
A7b — road narrows on the left
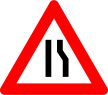
A7c — road narrows on the right
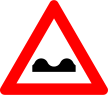
A13 — uneven road surface
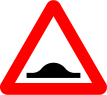
A14 — speed hump(s)
Some warning signs point to a specific obstacle or feature rather than the shape of the road itself:
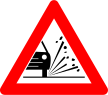
A17 — loose chippings
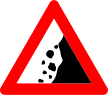
A19 — falling rocks
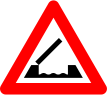
A9 — opening or swing bridge ahead
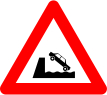
A11 — road ends at a quay or riverbank
Others warn of animals that may be crossing or using the road:
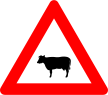
A29 — livestock crossing
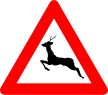
A27 — wild animals crossing
When no single pictogram fits, a general danger triangle is used with a small panel underneath explaining exactly what the hazard is — another example of the additional-panel (M) principle from above.
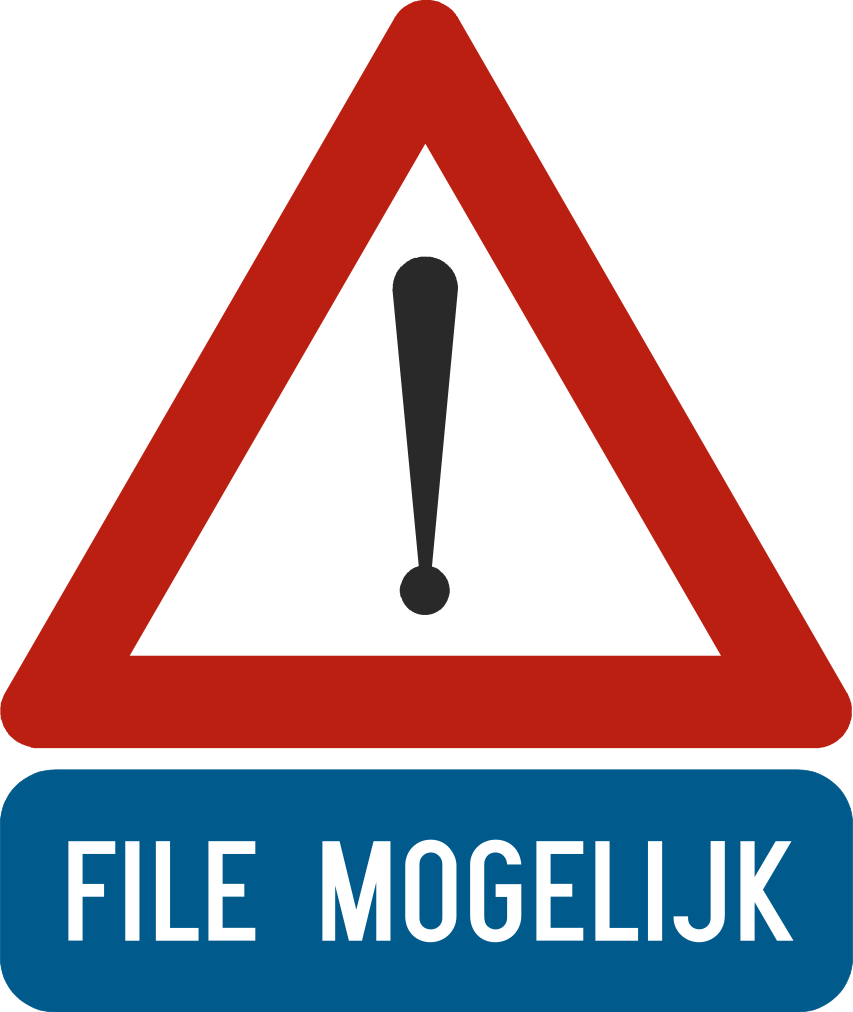
A51 — general danger, with a panel showing this hazard is a traffic jam ahead
More indication signs to recognise

F45b — dead end, except for pedestrians and cyclists

F23a — road number
The quick rule of thumb
Warning (A)
Priority (B)
Prohibition (C)
Mandatory (D)
Parking (E)
Indication (F)
- Triangle, red border → warning (A): be careful of a hazard.
- Downward triangle or octagon → priority (B): give way or stop.
- Circle, red border, white background → prohibition (C): something is forbidden.
- Circle, blue background, white symbol → mandatory (D): you must do this.
- Rectangle, blue, with 'P' or similar → parking/stopping (E).
- Rectangle, blue, informative pictogram → indication (F): useful information, not a command.
- Small rectangle under another sign → additional panel (M): modifies the sign above it.
Chapter quiz
Check what you remember. Questions and answer order are shuffled every attempt, and you'll have 20 seconds to answer each one.